With several CCA Teachers using Wacom tablets for classroom instruction, getting the device to work properly with your Macbook is essential. Luckily, Wacom has drivers and walkthroughs to help get this done.
Step 1: Download Drivers
Drivers will allow your Wacom tablet to communicate with Macbooks' Mojave OS, and there are two ways to get the process started.
Method 1: Click Here to download directly from the Wacom product page.
NOTE: The link opens to Wacom product search. Input the device you're wanting to use and it will take you to the driver download page.
Method 2: In Filewave, found by clicking the grey tornado icon in the upper right corner of your Macbook (![]() - it is very faint), select Install Software
- it is very faint), select Install Software
On the left side of the pop up box, click Drivers > Wacom Tablet Driver appears on the right > click Install. It will download Wacom's drivers and utilities.
NOTE: Method 2 downloads and installs, you can skip to Step 2: Security & Privacy Permissions (below)

Step 2: Installing Drivers
Double click the driver you downloaded. Once the driver has been installed, connect your Wacom tablet to the computer.
NOTE: If prompted for permissions during the installation process, choose to allow.
CCA Teachers, you have Admin rights on your Macbook, which is the same credentials you use to log into your computer. If those do not work, please submit a Tech Ticket.

Security & Privacy Permissions (*Most CCA Teachers will not need beyond this point and can skip to Step 3 below)
Follow these steps if you were not prompted for permissions, or if your pen or touch is not working correctly.
NOTE: If the pen or touch is not working after install, check these settings even if you were prompted to allow the permissions.
- Go to the Apple menu, open System Preferences, and select Security & Privacy.
- Go to the General tab, click the allow button located at the bottom for Wacom Technology Corp.
- Go to the Privacy tab, select Accessibility then click on the lock at the bottom of the preferences to make changes. You will be asked to input your credentials.
- On the list “allow the apps below to control your computer”, make sure any Wacom component listed has a checkmark. While you are here, ensure any known applications listed have a check as well. (For example, Photoshop will need to be selected to work correctly with the tablet, visit Adobe support guide for more information on adding this program if missing.)

- If no Wacom components are listed, move the Security & Privacy preferences to the side, we will need to return here within a few steps.
- Click on the desktop and press Command+Shift+G, open Finder, or click Go on the Menu Bar and select Go to Folder
- Type: /Library/Application Support/Tablet/ then press GO
- Locate com.wacom.IOManger.app
- Making sure you are still allowed to make changes (lock is open), drag and drop the item to the list under Accessibility in Security & Privacy. Ensure the new item is checked.
- Close the preferences, restart your computer
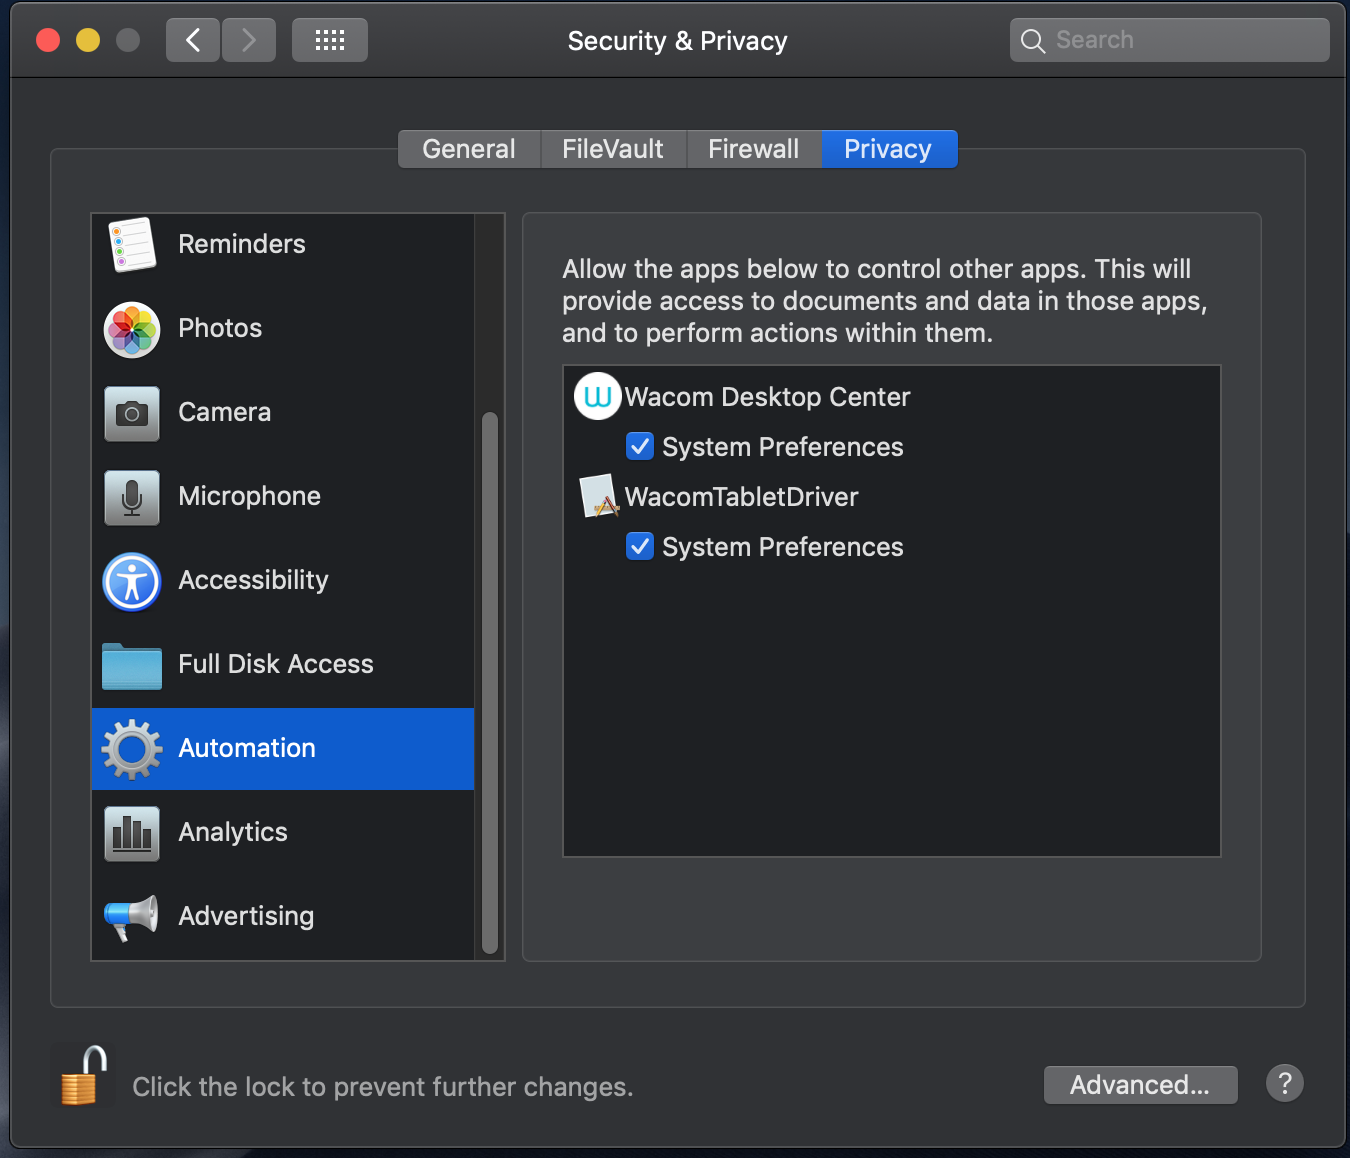
- Next check under Automation also in the privacy tab in the Security & Privacy preferences. Any Wacom components here such as the Wacom Desktop Center or the WacomTabletDriver should have checkmarks. If a component is not listed, it means it hasn’t requested control yet. To add the Wacom Desktop Center to Automation, follow the steps below.
- Launch the Wacom Desktop Center
- Select your device and go to any of the settings (such as pen settings)
- A dialog will open, make sure to allow the app
- Close the preferences, restart your computer
Step 3: Do Cool things with your Wacom ![]()
(Source: http://bit.ly/2Uy1m8w)